Weekly progress 2/23
This week I started experimenting with Hut modeling, which is currently the most complicated model because there are many details. In order to run smoothly in VR, I had to optimize the model, so I tried two methods to make it: 1. Xgen 2. patch and transparent texture. I take the following picture as the main basis:


First I tried the Xgen solution, similar to the method used by Pole before, but using the traditional generation method instead of interactive creation.

I used two methods to create and comb these hairs. In the beginning, I used the entire roof as a generation area and generated a lot of hairs. But it ’s not layered, and it ’s hard to comb a lot of hair. Soon I found a solution. I selected part of the roof as a generation area, which naturally produced layering and was easier to comb.

I carefully adjusted the orientation of these hairs because these hairs are also patches in nature.
I spend a lot of time adjusting and converting. The reason was that I ran into a problem: there was no way for my adjusted hair to be turned into a polygon. At first, I thought it was a bug. After trying various methods, I couldn’t fix it. I finally found the reason: When the density of Xgen is less than 0.01, although it can be previewed, it cannot be converted. So I had to use a density of 0.01 instead of 0.004. The converted model made me feel a little disappointed, it was too high and the effect was not very good. In addition, I felt a significant additional performance cost in Substance Painter when I tried to make the texture.

I used the second method, patches and transparent maps, which I think is easier to control. In the beginning, I did some tests and I placed the patches manually. I quickly learned to make transparent channels using Substance Painter because I usually don’t make transparent channel maps in SP.

I find this is a stupid way, and the transparency effect is a bit problematic. I tried several methods and used a better patch model.


I spent some time manually drawing textures, but there are still some minor problems.

I think this is a feasible solution, so I carefully adjusted the position of the patch to avoid exposing the part where the model is interspersed and carefully painted the map to prevent users from seeing obvious boundaries.
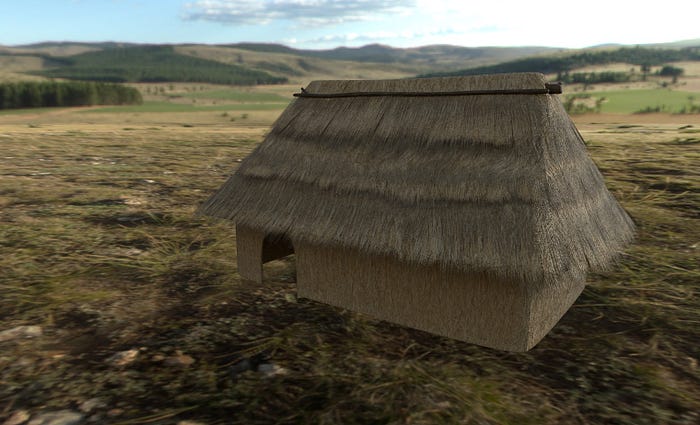
This is the current effect, the next step is to create an internal structure. For this, Joe and I obtained some information at Smith Lab last week. I use these materials to better understand the living environment at the time. Some items may need to be placed in Hut in the future.


